Save templates for Electronic Signature requests
How can re-use frequently used documents for electronic signatures? What does “Save Template” do in e-sign requests?
Types of Templates
Encyro E-Sign offers two types of e-sign templates:
-
Standard Template: You re-use the file to be signed along with all signature or other boxes added to be completed by the signers, as well as the configurations such as reminders, subject, email text, and login types. Use this template for files such as engagement letters or patient onboarding forms where the file to be signed is the same, or only needs a minor change such as a name to be changed before sending out each time. (This template is similar to e-sign templates offered by other electronic signature providers.)
-
Dynamic File Templates: This is useful when you want to change the file each time, but want to re-use the signature boxes, other fields to fill, and configurations such as reminders and the email subject. For instance, a new Form 8879 may be prepared for each client but the signature boxes need to be added at the same location. (This type of template is not usually available on other electronic signature services as of this writing.)
The steps to save either type of templates are similar; the only difference is at Step 7 below, where you may opt to include (or exclude) the file itself in the template.
The biggest advantage of saving a template is that you do not need to add the fields to be filled each time you send this request to a new client or signer.
How to create a template?
Pre-requisite: Creating a template requires an Encyro Pro membership. You may start a free trial via your Settings page. If you already started an e-sign request, click Save Draft and you may return to it later after changing your membership settings.
Start a new e-sign request as usual, with either an uploaded file, previously saved draft, or even from a previously saved template.
- Add signers. You may insert signers by name and email, or simply by roles such as ‘buyer’, ‘client’, ‘seller’ etc. The roles are only visible to you and not to the signers.
- Add a subject and optionally an e-mail introduction.
- You may configure signing order, access codes, reminders, login options, signature options and other settings. [See configuration options].
- Click Next.
- Insert all fields, such as signature boxes, that you need the signers to fill out.
- (Optional) If there is some text such as a project name or project end date that you need to insert in the document, use the Annotation field (you may change this text each time you send a request based on the template).
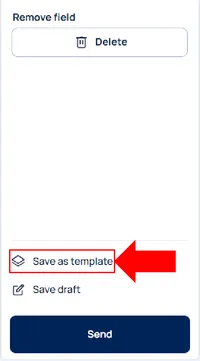
- After inserting the fields, click Save as Template (toward lower right of the screen).
- You will then be prompted to provide the following details:
- Template name: This is a name for the template that you will use to recognize the template later in the list of templates.
- (Optional) Description: You may also provide a description if you need to enter more details than just the name. This information is simply to remind you what the template is for.
- Include Files: This determines if the template uses the same file(s) each time or allows new files to be used when the template is used to start a new e-sign request. Turn this Off, if you want to use new files each time. Turn it On if you want to keep the same file(s) each time.
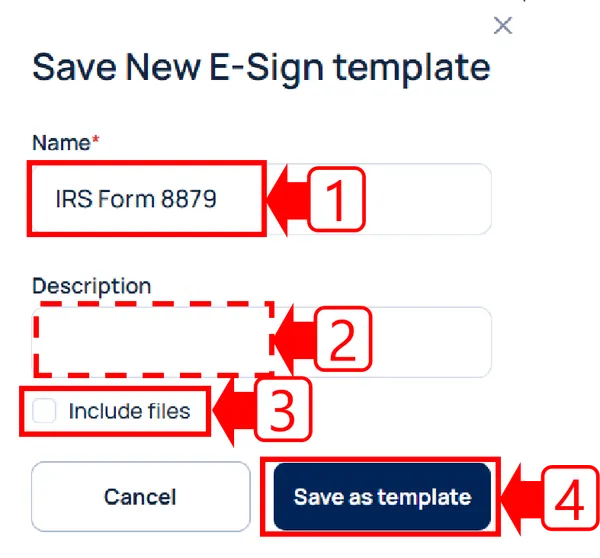
- Then click Save.
If you have added names and emails for signers, you may continue to send the current e-sign request. Or, you may close it.
Templates do not save the signers’ emails and names (since a template is intended to be used for different signers each time). If you only wish to save the current request to resume later, save a draft.
Continue to: How to use a saved template to sending a new e-sign request?
You may also modify a previously saved e-sign template.
Notes:
-
If you accidentally included the file but want to use the template with a new file, simply start an e-sign request with the saved template. Scroll down and click Save Template at the bottom. Turn off the switch to include the file: this will let you save a new template, but this time without the file. You may then delete the old template from the list of templates, or if you gave the new template the same name, overwrite the old one.
-
When using dynamic file templates, the file used each time must be similar, so that the signature and other boxes added in the template make sense for all files. You may however use dissimilar files if the items to be filled can be retained in the same place for all files (such as two different contracts but each needing a signature at the bottom of the first page).
Related articles
-
Send an Encyro E-Sign Request
To send an electronic signature request, login to your Encyro account and: Click the Compose E-sign button in the left menu, just above your client folders....
-
Insert fields to fill or sign in
When creating an electronic signature request, or simply a form to be filled without signatures, you must insert the fields that the recipient will complet...
-
Use access codes by text (or knowledge based authentication) on e-sign requests [Video]
How can I comply with IRS remote electronic signature requirements for forms 8879 and 8878? Is Encyro E-Sign KBA valid for IRS compliance? Do I need credit...
-
How to Delete an E-Sign Request
How can I delete a document sent for signature? I sent the wrong document for signature, how can I delete it? I need to send a corrected request, how to de...
-
How to Edit an E-Sign Template
Can I modify a previously saved template? How to make a change to a previously saved e-sign template, such as to change the reminder settings or add an add...
-
Branding for E-Sign Requests
If you have a business logo uploaded or other brand settings configured as part of your Encyro account settings (in the Brand section), then those brand se...
-
Send an e-sign request using a saved template
How do I use a previously saved template? If you have previously saved an e-sign template, it will show up when you click the Compose E-Sign button in the ...
-
Save as draft to send later
Saving a draft If you started working on an e-sign request, such as by selecting the file and adding fields, but are not ready to send it just yet, you may...
-
Configure E-sign Options: Reminders, Login types, and more
The simplest way to send an e-sign request is to select a file, add a subject, add fields for signers to fill/sign in, and send it to their email a...
-
Sending custom forms to clients
If you have certain forms that you need your clients to fill out, such as a new patient form or other informational forms, you may use the e-sign feature t...
-
Send an E-Sign Request, Invoice, or Secure Message Similar to a Previously Sent One Without Creating a Template
The “Send Similar” feature allows you to quickly reuse any message, invoice, or e-sign request you've previously sent. This eliminates the need to manuall...